Terminal Window
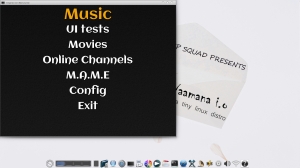
MUSIC PLAYER

SHUT DOWN WINDOW

SETTINGS PANEL
OPERA BROWSER
MTPAINT TOOL
VIDEO MIX PLAYER
MOUNT TOOL
NOTEPAD
HD/TC INSTALL
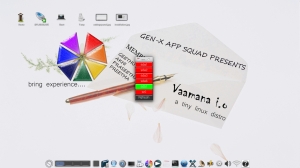
VAAMANA DESKTOP
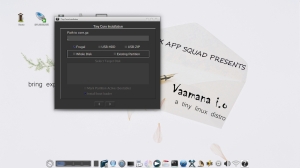
APP INSTALLATION
Terminal Window
MUSIC PLAYER
SHUT DOWN WINDOW
SETTINGS PANEL
OPERA BROWSER
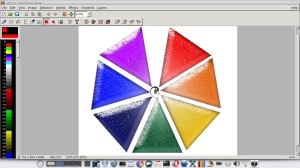
MTPAINT TOOL
VIDEO MIX PLAYER
MOUNT TOOL
NOTEPAD
HD/TC INSTALL
VAAMANA DESKTOP
APP INSTALLATION
2.3 SYSTEM IMPLEMENTATION AND TESTING
2.3.1 Hardware Used Implementation
System implementation is the final phase i.e., putting the utility into action. Implementation is the state in the project where theoretical design turned into working system. The most crucial stage is achieving a new successful system and giving confidence in new system that it will work efficiently and effectively. The system is implemented only after thorough checking is done and if it is found working in according to the specifications.
It involves careful planning, investigation of the current system and constraints on implementation, design of methods to achieve. Two checking is done and if it is found working according to the specification, major task of preparing the implementation are educating, training the users.
Here It tested using VMware virtual workstation for creating different scenario’s having hardware storage space varies from 2GB – 8GB and in a personal computer having 500 GB Secondary Storage Space, also varies the RAM size from 64MB to 3GB for running and implementing the current system. And the test results were so fine. And found that, it maintains its efficiency in all the scenarios without any fall.
2.3.2 System Testing
White-Box testing
White-box testing is a test case design method that uses the control structure of the procedural design to derive test cases. White-box testing of software is predicted on close examination of procedural detail.
Black-Box testing
The black-box testing focuses on the functional requirements of the software. It helps to find out errors in incorrect or missing functions, interface errors, errors in data structures, performance errors and initialization and termination errors. The black-box testing is applied during the later stages for the functional requirement evaluation.
TEST RESULTS AND CONCLUSIONS
3.1 Tests
Apart from those common steps always referred in system software engineering testing, this project has been done in a different way. After creating iso using the UNIX commands earlier in chapter two, it has been tested,
* By Using Vmware/Virtual Box Virtual Workstations.
* Done by creating usb bootable image in usb stick, memory card via usb image creator tools like lili,usbcreator etc..
* And also tested by writing the image file to cd and boot.
Followed by alpha testing by the creators of Vaamana, they fixed some graphical bugs and those tried hard to make the distro into a stable one. After that it has been published online by google cloud storage. Then it was downloaded by some geeky programmers in government engineering college, and it was very glad to share to the real world of disto lovers that, beta test too was also completed with almost zero number of bugs.
Earlier, at the time of re-mastering, each project modules and parts in C shell script inside kernel has been compiled by gcc (gnu graphical compilers) , and fixed the bugs and the time itself.
3.2 Results
It was a nice good smelling miracle to us that the project was a success with in a limited time of three months. This has been tested in all the different scenarios and worked very well.
In 64MB small configured old computers,it takes more than 4 minutes to boot, it was some sort of bad impression to the creators,but still it is working very well with swapping enabled.
One unfortunate thing noticed was,it is working very well in personal computers and terminals, but in low graphics ram extended lap top’s results was not that much impressive.
The tcz repositories of firefox and bluefish is not packaged very well , that sometimes causes stalling while downloading ,and causes into an unstable distro version.
3.3 Conclusion
The various process of the construction of the proposed system has all been completed. The entire process was not meant to be a simple solution to the problem that was proposed. Even though the current system solved a lot of problems of the existing systems. Many other reports can be produced and new variations can be drawn up. This is also meant to be the foundation stone for something that heals the largest miracle of excellence.
3.2 Scope for Future Enhancement
There are a limited number of tcz and scm extension applications available in the tcz repository. There is a need of a GUI application which can convert all type of applications in .gz or .tar form into tcz or scm form. For that as a future work, The Team interested to focus on creating a GUI application extension Creator in Python.
Nowadays a lot of ARM Processor based operating systems like Android; IOS etc. are emerging in the field used in tablets and smart phones. The GEN-X APP Squad were also interested to build a” tiny Vaamana arm based O/s “in the near future.
The first step before you install any operating system such as Vaamana is to back up everything on your computer before starting.
Before making the commitment to perform a frugal install you should consider our Quick and Easy Overview. It covers the basics of running Vaamana from CDROM and/or USB pen drive. Most will find learning Vaamana the quick and easy way a better starting point.
But for those who are ready to take the plunge to frugal, this guide shows step by step information on how to install TC via the installer. The older instructions for a manual install are still available, but using the installer is recommended.
The guide assumes you’ve either booted the Vaamana CD, or have installed the tc-install extension (tc-install.tcz)
Keep in mind that this guide is basic and that the user may choose to adapt, remove and/or add parts as desired.
The installer is also applicable to USB sticks and other external media.
Note: If you already have a Linux System booting, then you do not need to make a partition for Vaamana! Vaamana can run in a single directory in your existing Linux installation. To do so, at step 1, uncheck the option to “Install boot loader”. At step 2, select an existing partition, and at Step 3, do not format it. Upon completion you will need to manually configure your existing boot loader.
Open the installer:
Fig 1.1: Open the installer
It can also be started via the shell or Run icon by typing “tc-install”.
Browse to /mnt/device/boot and select the core.gz file. With the source selected, pick the desired install type and target. Here going to install to an empty harddrive.If using an existing partition, tick the box to mark it active to have it bootable.
3. Formatting
Format the new partition. It’s recommended to pick one of the ext* options to support Linux permissions.
4. Boot codes
If you want to use additional boot codes, enter them now. Otherwise leave this blank.The example boot codes set a frame buffer resolution and disable wbar icons.
Note that you can edit them any time after the install in the boot loader’s config file, usually extlinux.conf.
If you are installing from the Vaamana CD you will see an additional screen asking which extensions from Vaamana you would like to install. Note that you will only see this screen if running the installer from a Vaamana CD.
If you are installing from the Vaamana CD,You should select the cde or tce directory that contains the extensions that you would like installed. For example, if the Vaamana CD is mounted on /mnt/sr0 you should select /mnt/sr0/cde. Note that you will not see this screen if installing from Vaamana.
If everything’s OK, click on proceed: The time required will depend on the size of your hard drive.
The time required will depend on the size of your hard drive.
see http://wiki.tinycorelinux.net/wiki:install_hd for more information
CHAPTER 2
SYSTEM ANALYSIS AND DESIGN
2.1 SYSTEM ANALYSIS
2.1.1 Existing Systems
There are no ideal operating system having features like portability, scalability, small in size, easily bootable, ease of installation, deployment and use.The table below offers a quick feature comparison of operating systems
| Platform Comparison Chart | ||||||||
| System | Connectivity | Stability | Scalability | Multi-user | Multi-platform | POSIX | Non-proprietary | Avg. Price |
| Legacy System | Poor | Good | Medium-Huge | Yes | No | No | No | $$$$ |
| MS-DOS | None | Poor | Small | No | No | No | No | $100 |
| Windows 3.x | Poor | Poor | Small | No | No | No | No | $100 |
| Windows 08 | Excellent | Fair | Small-Huge | Yes | Yes | Yes | No | $240 |
| WindowsNT | SMB+ | Fair | Small-Medium | Yes | Yes, 2 | Some | No | $500 |
| UNIX | Excellent | Excellent | Small-Huge | Yes | Yes, Many | Yes | No | $5000 |
| *BSD | Good | Excellent | Small-Large | Yes | No | Yes | Yes | $50 |
| Linux | Excellent | Excellent | Small-Huge | Yes | Yes, Many | Yes | Yes | $50 |
Table 1: Characteristics of Different Operating Systems
2.1.2 Requirements of New System
2.1.3 Proposed System
Every user who is experienced in the existing system may think of a system that may ease the hardness and difficulty of their jobs since a lot of carryovers and transferring are carried out each day. A lot of effort and money are wasted each day so they think about the new system. The proposed system is designed in such a way to avoid the limitations of the existing system.
The proposed system has been designed to eliminate the major disadvantages of the existing systems. The additional features and facilities provided in the proposed system such as
2.1.4 Technical/Economical/Operational Feasibility
Technical feasibility centres around the existing computer system (hardware, software etc.) and to what extend it can support the proposed system addition. Requirements of our system are Minimum 64 MB RAM., Less than 300 MB hard disk space (for installation only).
Considering the Economic feasibility, our proposed system is purely an open source, freely distributable and can be freely downloadable from the website
www.vaamanalinux.wordpress.com
Considering Behavioural feasibility, the people are inherently resisted to change and the computers have been known to facilitate change. But still proposed system having a GUI like commonly used operating systems, it doesn’t require special effort to educate, sell and train the user on the new way of conduction business.
That is proposed system is feasible under the current scenario. But it’s so much difficult to build an ideal system within a couple of months.
2.1.5 System Requirement Specification
| Software applications to be used | Linux 2.6 Kernel, Enlightenment toolsSquashfs tools, advcomp library, linux Mint as a remastering platform, gzip library for zipping and unzipping. Zcat library for extracting and archiving iso. |
| Storage Requirements | No Hard Disk Storage space required for live running, else it needs less than 300 MB for HD installation. |
| System Memory | Minimum 64 MB RAM |
| Input Devices Needed | Mouse/Touch Pad, Keyboard. |
| Output Devices to be used | Monitor |
| Network | Wi-Fi/LAN Needed For Additional Installation/Updating. |
Table 2: System Specification
2.2 SYSTEM DESIGN AND DEVELOPMENT
2.2.1 Source Code Modification Module
VAAMANA Tiny Linux distro is a small sized, portable Linux O/s with minimum requirements. But it is difficult to build an OS within a short period of time. So planned to edit an existing small sized Linux O/s. For that here referred different small sized Linux distros such as tiny core Linux, LUBANTU, PUPPY LINUX, KOLIBRI, SLAX, and SLITAZ.
Slitaz GNU/Linux is a free operating system working completely in memory from removable media such as a cdrom or USB key. It is light, speedy and fully installable on a hard drive. It is distributed in the form of a LiveCD that you can easily burn to a cdrom and boot from. When the system is running you can eject the LiveCD and use your CD drive for other tasks. But it is not being able to install new software easily apart from stuff in the Slitaz package format and not able to connect to the internet easily.
Puppy Linux includes a wide range of applications: word processors, spreadsheets, internet browsers, games, image editors and many utilities. But it is not stable and not able to connect to the internet.
From these here selected Tiny core Linux. It is very small in size (64 MB). It is flexible enough to be stored and run from usb sticks, a just-about-full CD, or even embedded device. It uses the Linux Kernel and a set of command-line (text interface) tools including busy box. It has a flexible and fully-customizable Graphical User Interface Desktop. Mouse, keyboard, and screen support basically works out-of-the-box thanks to FLWM, the FLTK Desktop. You can also quickly install and try out a variety of other desktops and interfaces including Flux box, XFCE, Open box, Ice WM, Joe’s WM, LXDE, and others. Instead, Tiny Core lets you quickly and easily compare, select, download, and install your preferred web browser, word processor, music player, and other software. It is unusually stable. Every time Tiny Core loads, it is brand-spanking new. That means Tiny Core just doesn’t get a blue screen. Instead of installing programs into the system file space and risking damage to the system files, Tiny Core uses program ‘extensions’ that are re-prepared at each reboot … and they are prepared fast. Tiny Core is under active community development and can find answers and ask questions in the forum, help add extensions (programs) to the Tiny Core Repository.
2.2.2 Graphical User Interface Module
Our goal is the creation of a nomadic ultra-small graphical desktop operating system capable of booting from cdrom, flash drive, or frugally from a hard drive. The desktop boots extremely fast and is able to support additional applications and hardware of the user’s choice. While Tiny Core includes the base Core system and a dynamic FLTK/FLWM graphical user interface, It has been included the window manager Enlightenment which controls the appearance of windows on the screen.
| Full Environments | Semi-Environment | Window Managers Only | |||
| KDE | GNOME | Enlightenment | Awesome | Blackbox, Openbox, Fluxbox and IceWM | |
| MainObjective | Full desktop environment, graphical, easy to use, and targeted at everyone. | Full desktop environment, graphical, easy to use, and targeted at everyone. | Framework window manager (extensively customizeSuper-minimalistic. | Fast, lightweight. Nearly zero library dependencies. | Super-minimalistic. |
| Programming Language | Mainly C++, as Qt is written in C++ | Mainly C, as GTK+ is written in C | C | C, Lua | C++, Openbox uses C |
| Size | 210 MB | 180 MB | DR16: ~3 MB, DR17: ~15MB | ~700 KB with 20,000 lines of code | Blackbox: ~350 KB, Fluxbox: ~800 KB |
Table 3: Comparison of Different Window Managers
Enlightenment allows you to have a grid of workspaces called virtual desktops. Switching between them is achieved by hurling the mouse cursor to the edge of the screen, at which the desktop appears to slide across to reveal the next. The maximum grid size is currently 8 by 8 desktops, and you can have 32 grids (each with a different background), making 2048 total possible desktop spaces. (Users can enable a map of the desktops, in case they get lost, which is called the pager.). The desktop dragbar allows a desktop to be ‘slid back’ to reveal the desktop ‘underneath’. The E team use the analogy of sheets of paper, stacked on top of each other, where you can slide off a piece partially to reveal what’s beneath.
It also includes Cairo-docks as in Ubuntu. Cairo-Dock is a pretty, light and convenient interface to the desktop and able to replace advantageously the system panel! It features multi-docks, taskbar, launchers and a lot of useful applets. Applets can be detached from the dock to act as desktop widgets. Numerous ready-to-use themes are available in 1 click, and can be easily customized at our convenience.
It includes apps and scmapps to add or remove applications easily. Scm (self-contained applications) apps integrated with its dependency files also. So it is not needed to install dependencies separately.
2.2.3 Merging and Execution Module
In general the standard TC kernel is a fairly standard Linux kernel, meaning that is has just a few set of patches applied. In general I think that TC will work with a kernel without patches, i.e. a “pure” standard Linux kernel. However some of the patches applied in the standard TC kernel are required for some TC specific functions to work, so if you depend on such functions you need to make sure that you apply the corresponding patch (es) before building your own kernel. Standard Linux kernel sources are available at
http://www.kernel.org/pub/linux/kernel
Where The Linux kernel is the operating system kernel used by the Linux family of Unix-like operating systems. It is one of the most prominent examples of free and open source software.
The Linux kernel is released under the GNU General Public License version 2 (GPLv2) (plus some firmware images with various non-free licenses), and is developed by contributors worldwide. Day-to-day development discussions take place on the Linux kernel mailing list.
The Linux kernel was initially conceived and created by Finnish computer science student Linus Torvalds in 1991. Linux rapidly accumulated developers and users who adapted code from other free software projects for use with the new operating system. The Linux kernel has received contributions from thousands of programmers. Many Linux distributions have been released based upon the Linux kernel.
Different Types of Kernel are
| Microkernel | Monolithic Kernel |
| Easily Maintainable | Difficult in Updating & Deletion |
| Size not prefixed, increased while adding extensions | Size about 20-30 MBResulting in a tedious, maintenance process. |
| Run multiple operating systems concurrently | If the kernel changes, the set of modules changes too. |
| Completely integrate into the processor’s architecture | Not completely integrate |
| Easily extended and modified | Continuously enhanced, it often changes its structure. |
| Drivers integrated separately | Drivers with in the kernel |
Table 4: Monolithic Kernel V/s Microkernel
The TC patches and other related files for the standard TC kernel are available at
http://distro.ibiblio.org/tinycorelinux/4.6/x86/release/src/kernel/
The process to create a custom kernel could in short be described as:
At this point you will find the kernel file as “arch/x86/boot/bzImage” (relative to the directory from where you issue all the make commands). Further you will find all loadable modules and firmware files under”/path/lib/modules/kernel_version” and”/path/lib/firmware”
The bzImage file need to be moved to a location where your boot loader can access it and the boot loader needs also to be configured to boot using the new kernel.
When it comes to the modules and firmware files, you basically have two options, either let them be part of your initrd (a file named “tinycore.gz” in TC) or let them be part of extension files (*.tcem). In most cases it is probably best to have some of them built into the initrd and some available as loadable extensions. If you are unsure, build all of your files into the initrd. This will give you a tinycore.gz which is significantly larger than the one provided by standard TC, but in most cases you could probably live with that until you have the time to sort out the details of what modules should be put where. When you build your initrd you need to place the modules found under”/path/lib/modules” under “lib/modules” relative to the root of the initrd. Similarly the files under”/path/lib/firmware” should be put under “lib/firmware” relative to the initrd root.
Important: If you are using a custom kernel you should never use any *.tcem files from standard TC. You could probably load them and they will likely not produce any harm, but taking up memory space, but they will not provide the function you expected. As you can notice above the modules are placed under a directory that contains the current kernel version and the modprobe program will only load modules from the directory that matches the version of the current kernel.
The standard TC initrd and the standard *.tcem packages are structured as follows to allow dynamic loading of module extensions:
The module files in the *.tcem, when installed, are found as
/usr/local/lib/modules/……
In order from them to be visible under
/lib/modules/…
The initrd contains a link called “lib/modules/<<kernel_version>>/kernel.tclocal” which points to “/usr/local/lib/modules/<<kernel_version>>/kernel
As you probably could imagine, the standard initrd has no knowledge of your kernel version, so you have to create this link in your initrd explicitly.
Remember that the standard TC *.tcem files could only be used with the standard TC kernel so this “contract” between the TC *.tcem file structure and the link in initrd is not something you need to follow. You could make up your own way to solve this or use the same method, it is totally up to you.
1. Unpacking the ISO
In the core_plus-current.iso file, there is a gzipped cpio archive. This can then be bundled along with the kernel for the boot method you like, for example an ISO image.
The merging process can be done from inside TC (with advcomp.tcz loaded, and mkisofs-tools.tcz if you want to create an ISO image), or from any other Linux distribution that has the required tools (cpio, tar, gzip, advdef, mkisofs if making an ISO)
First, get the kernel and tinycore.gz from the iso:
sudo mkdir /mnt/tmp
sudo mount tinycore.iso /mnt/tmp -o loop,ro
cp /mnt/tmp/boot/bzImage /mnt/tmp/boot/tinycore.gz /tmp
sudo umount /mnt/tmp
If you are going to create an ISO image, instead of copying only two files, copy everything:
sudo mkdir /mnt/tmp
sudo mount tinycore.iso /mnt/tmp -o loop,ro
cp -a /mnt/tmp/boot /tmp
mv /tmp/boot/tinycore.gz /tmp
sudo umount /mnt/tmp
Then, extract tinycore.gz for adding/removing something:
mkdir /tmp/extract
cd /tmp/extract
zcat /tmp/tinycore.gz | sudo cpio -i -H newc -d
Now, the full file system is in /tmp/extract. Feel free to add, remove, or edit anything you like.
Current opt/shutdown.sh file is not previously included with back up commands to hold the user changes, needed to implement that added some shell scripts to it ,for creating a mydata.tgz back up file at the time when user clicks the backup option, and it automatically create “mydata” file with new holdings in.tgz compression in /tce/optional/ folder.
At the time of next booting,holdings will be retrieved through unzipping “mydata.tgz” file, and merge it with the boot options.
Now the new shutdown.sh file will be look like as
#!/bin/sh
# put user shutdown commands here
# If no backup of home was done then loop through valid users to clean up.
if [ ! -e /tmp/backup_done ] || ! grep -q “^home” /opt/.filetool.lst; then
awk ‘BEGIN { FS=”:” } $3 >= 1000 && $1 != “nobody” { print $1 }’ /etc/passwd > /tmp/users
while read U; do
while read F; do
TARGET=”/home/${U}/$F”
if [ -d “$TARGET” ]; then
rm -rf “$TARGET”
else
if [ -f “$TARGET” ]; then
rm -f “$TARGET”
fi
fi
done < /opt/.xfiletool.lst
done < /tmp/users
fi
Note: Where /opt/.filetool.lst contains applications to be appeared in the distro, and /opt/.xfiletool.lst will explain apps which are ignored at the boot time.
Copy all extensions to /tmp/newiso/tce/optional.
It is easiest to install applications using the appbrowser, so that .dep files and dependencies are included, then copy them all. Extensions are in the /tce/optional directory. If using cloud mode, they are in /tmp/tce/optional. If not using this method, ensure you include all .dep files and dependencies.
It is not necessary to use On Boot or On Demand, as you can use Install Local. However, it may be more convenient to use On Boot or On Demand, or have some applications in each. This enables you to just start applications from the wbar and menu. If On Demand (or Install Local) is used, the CD can be run on a computer with less RAM than On Boot. It is easiest to set up On Boot and On Demand in the computer, then copy the entire tce directory to /tmp/newiso, including the On Boot file, and the On Demand directory.
It is a good idea to include install-tools.gz for installing Tiny Core, and network-tools.gz for connecting to the Internet. Copy these to the tce directory (not /tce/optional).
If you don’t plan to use backup, you may edit isolinux.cfg, and include “norestore”.
Added Extensions in this distro are,
Xpdf
Xpdf is an open source viewer for Portable Document Format (PDF) files.It runs under the X Window System on UNIX, VMS, and OS/2.Xpdf is designed to be small and efficient. It can use Type 1, TrueType, or standard X fonts and should work on pretty much any system which runs X11 and has Unix-like (POSIX) libraries.
MtPaint
MtPaint is a painting program that can easily create pixel art and manipulate digital photos.It uses the GTK+ toolkit (version 1 or 2) and runs on PC’s via the GNU/Linux or Windows operating systems. Due to its efficient design it can run on older PC hardware (e.g. a 200MHz CPU and 16MB of free RAM).
Mplayer
Mplayer is a movie player for LINUX (runs on many other Unices and non-x86 CPUs, see the documentation). It plays most MPEG/:VOB, AVI, ASF/:WMA/:WMV, RM, QT/:MOV/:MP4, OGG/:OGM, VIVO, FLI, NuppelVideo, yuv4mpeg, FILM and RoQ files, supported by many native, XAnim, and Win32 DLL codecs. You can watch VideoCD, SVCD, DVD, 3ivx, DivX 3/:4/:5 and even WMV movies, too (without using the avifile library).
Another great feature of MPlayer is the wide range of supported output drivers. It works with X11, XV, DGA, OpenGL, SVGAlib, fbdev, AAlib, DirectFB, but you can also use GGI, SDL (and this way all their drivers), VESA (on every VESA compatible card, even without X11), some low level card-specific drivers (for Matrox, 3Dfx and ATI) and some hardware MPEG decoder boards, such as the Siemens DVB, DXR2 and DXR3/:Hollywood+. Most of them support software or hardware scaling, so you can enjoy movies in full screen.
Opera 9
Opera is a web browser and Internet suite developed by Opera Software with over 270 million users worldwide. The browser handles common Internet-related tasks such as displaying web sites, sending and receiving e-mail messages, managing contacts, chatting onIRC, downloading files via BitTorrent, and reading web feeds. Opera is offered free of charge for personal computers and mobile phones.
Opera is the most popular desktop browser in Belarus. Opera Mini, which is the most popular[8] mobile web browser as of May 2011, has been chosen as the default integrated web browser in several mobile handsets by their respective manufacturers.
Features include tabbed browsing, page zooming, mouse gestures, and an integrated download manager. Its security features include built-in phishing and malware protection and the ability to delete private data such as HTTP cookies. Opera has been noted for originating many features later adopted by other web browsers.
Leafpad
Leafpad is an open source text editor for Linux, BSD, and Maemo. Created with the focus of being a lightweight text editor with minimal dependencies, it is designed to be simple and easy-to-compile, and is the default text editor for both the LXDE Desktop environment and Xubuntu11.10 and 12.04.
Editing isolinux.cfg and syslinux.cfg file inside /boot/isolinux/ can be edited like given below to edit the boot up screen and windows.
ISOLINUX/SYSLINUX CONFIGURATION FILE
DEFAULT vaamana
UI menu.c32
PROMPT 0
TIMEOUT 600
ONTIMEOUT vaamana
F1 f1
F2 f2
F3 f3
F4 f4
MENU TITLE Vaamana 1.0-Created By GEN-X APP SQUAD – MCA 13, GEC
MENU MARGIN 6
MENU VSHIFT 1
MENU ROWS 13
MENU TABMSGROW 19
MENU TABMSG Press ENTER to boot, TAB to edit, or press F1 for more information.
MENU AUTOBOOT BIOS default device boot in # second {, s}…
MENU HELPMSGROW 21
LABEL Vaamana
MENU DEFAULT
MENU LABEL Vaamana
KERNEL /boot/vmlinuz
APPEND initrd=/boot/vaamana.gz loglevel=3 cde waitusb=5 vga=788
LABEL Vaamana wifi
MENU LABEL Vaamana + Wifi
KERNEL /boot/vmlinuz
APPEND initrd=/boot/vaamana.gz loglevel=3 cde waitusb=5 lst=onbootwifi.lst vga=788
LABEL Vaamana Modem
MENU LABEL Vaamana + Modem
KERNEL /boot/vmlinuz
APPEND initrd=/boot/vaamana.gz loglevel=3 cde waitusb=5 lst=onbootmodem.lst vga=788
LABEL Vaamana No 3D
MENU LABEL Vaamana Low Graphic
KERNEL /boot/vmlinuz
APPEND initrd=/boot/vaamana.gz loglevel=3 cde waitusb=5 lst=onbootno3d.lst vga=788
LABEL Vaamana No 3D WIFI
MENU LABEL Vaamana Low Graphic + Wifi
KERNEL /boot/vmlinuz
APPEND initrd=/boot/vaamana.gz loglevel=3 cde waitusb=5 lst=onbootno3dwifi.lst vga=788
LABEL Vaamana No 3D Modem
MENU LABEL Vaamana Low Graphic + Modem
KERNEL /boot/vmlinuz
APPEND initrd=/boot/vaamana.gz loglevel=3 cde waitusb=5 lst=onbootno3dmodem.lst vga=788
LABEL Vaamana
MENU LABEL Vaamana – https://vaamanalinux.wordpress.com/
BOOT.MSG FILE
GEN-X APPS PRESENTS
VAAMANA 1.0
Is a MiniProject from Government Engineering College, MCA 2010-13 Students
Distributed with ABSOLUTELY NO WARRANTY.
Is a remaster of Core linux.
Has Busybox & enlightenment (DR17) desktop
Used Core Version 4.6.2 Version,Linux 2.6 Kernel
https://vaamanalinux.wordpress.com/
—————— GEN-X – GEETHU
————————— A – AKHI
———————————– P – PRASEETHA
————————————— P – PREETHA
——————————————– S – SIJO SIR (GUIDE)
Press ESC to return to the main menu.
Press F2, F3, or F4 to view additional boot options.
cd /tmp/extract
sudo find | sudo cpio -o -H newc | gzip -2 > ../vaamana.gz
cd /tmp
advdef -z4 vaamana.gz
It is packed at level 2 to save time. advdef -z4 is equivalent to about -11 on gzip.You now have a modified tinycore.gz. If booting from other than a CD, copy tinycore.gz and the kernel to your boot device.
If you would like to create an ISO image:
cd /tmp
mv vaamana.gz boot
mkdir newiso
mv boot newiso
mkisofs -l -J -R -V TC-custom -no-emul-boot -boot-load-size 4 \
-boot-info-table -b boot/isolinux/isolinux.bin \
-c boot/isolinux/boot.cat -o vaamana.iso newiso
rm -rf newiso
Note 1: the mkisofs command line example above spans three lines, but is actually entered as ONE line
Note 2: the -r option should be added to avoid permissions errors if the new ISO is being built outside a TinyCore environment
Vaamana.iso can now be burned or started in a virtual machine.
7. Execution
After Creating iso using the above mentioned methods, run it
* By Using Vmware/Virtual Box Virtual Workstations.
* Can possible to make usb bootable in usb stick,memory card using usb image creator tools like lili,usbcreator etc..
* Can possible to write the image file to cd and boot.
2.2.4 Installation/Updating Module
A package is a specific piece of software which the system can install and uninstall. The package is typically provided as compiled code, with installation and removal of packages handled by a package management system (PMS) rather than a simple file archive. Each package intended for such a PMS contains meta-information such as a package description, version, and “dependencies”. The package management system can evaluate this meta-information to allow package searches, to perform an automatic upgrade to a newer version, to check that all dependencies of a package are fulfilled and/or to fulfill them automatically.
Install applications using commands
To install applications, you need to be connected to the Internet.
To install an application, and put it in On Boot, use
tce-load -wi app_name.tcz
To install an application, and put it in On Demand, use
tce-load -wo app_name.tcz
To download an application to the /tce/optional directory, but not put it in On Boot or On Demand, use
tce-load -w app_name.tcz
To download an application to the /tce/optional directory, and load it this time, but not put it in On Boot or On Demand, use
tce-load -wil app_name.tcz
To find out the tce directory, use
cat /opt/.tce_dir
To start an application that is not loaded, use
tce-run app_name
To load an application, use
tce-load -i app_name
or
tce-load -is app_name
Update an application
To update applications, you need to be connected to the Internet ,open terminal and type tce-update
Backup and Restore
To run backup, open the terminal and use
filetool.sh -b
To find out where backup is saved, use
cat /opt/.backup_device
To list files that will be in backup and their size, use
filetool.sh -d
To restore files in backup, use filetool.sh –r
GUI Installation
Select Mirror
To have a list of mirrors to choose from, install mirrors.tcz. To select a mirror, open the App Browser, and click Mirrors, then select a mirror.
To install applications while connected to the internet, open the App Browser.Click Connect.
You will then see a list of extensions, and information about them.
Click on a application you want to install. Then click Go. The application and its dependencies will be downloaded and installed.
When completed, there will be a message saying OK.
When installing applications you may select OnBoot, OnDemand, Download and Load or Download Only.
OnBoot: If OnBoot is used, the application is loaded every time the computer is started. Applications you always use, should be in OnBoot.
On Demand: If OnDemand is used, applications are not loaded until you start them. When using OnDemand, the computer starts quicker, and uses less RAM. This is ideal for applications you only use sometimes, particularly for computers with small RAM.
Download and Load: If Download and Load is used, the application is downloaded and loaded this time only. The next time you start the computer, it will not be loaded. It will still be in the tce directory, but the computer will not do anything with it.
Download Only: If Download only is used, the application is only downloaded. It will be in the tce directory, but the computer will not do anything with it.
The applications in OnBoot and OnDemand can be changed using Apps Audit.
Do not put dependencies in OnBoot or OnDemand. They will be automatically included.
You can enter a search term, and search for a certain type of application. You can also change search to provides, and find out which extension provides something.
You can load applications using Install Local. To do this, open the App Browser, click Local, select an application, and click OK.
Extensions may be downloaded from one of the mirrors
To install applications on a computer which is not connected to the internet, download the extensions. Include .dep files, dependencies, and dependencies of dependencies.
If the computer will be connected to the internet in the future, include .md5.txt files, as these are used to determine which programs have been updated. They can also be used to check if any extensions have been corrupted.
CHAPTER 1
INTRODUCTION
1.1 Project Overview
In recent years a powerful and innovative UNIX work-alike has emerged its popularity is beginning to rival that of its UNIX predecessors.
The Linux operating system includes features from both Berkley Software Distribution (BSD) and Unix System V but departs from UNIX in several significant ways. The core of the operating system, like kernel is implemented completely independently of both BSD and System V.
The continuing development of Linux is taking place through the combined efforts of many capable individuals throughout the world and Linux puts the power of UNIX within easy reach of business and personal computer users.
There is a rich selection of applications available for Linux-both free and commercial. There is also a wide variety of tools: graphical, word processing, networking, webserver, web page creation and many others.
Vaamana Linux tiny distro is proposed to be an Unix-like (Almost like Linux) distro or can mention it as a tiny Linux operating system which will be in very small in size , can be able to run in minimum requirement systems and can be portable through a flash drive ,or via a CD or via a Memory Card It will be a complete bootable distro which runs in the computer’s memory, rather than loading from the hard disk drive ( can be also possible to install on Hard Disk). It can run on a computer lacking secondary storage, such as a hard disk drive, or with a corrupted hard disk drive or file system, allowing users to rescue data.
The base install is competent enough for a variety of tasks. That may include, a cluster of useful tools included as a part of the minimal install, including a paint tool (like gimp, a simple raster/bitmap graphics editor), a PDF reader, multimedia players and a text editor. If you feel the need to expand out of the minimal applications, our system will contain an Install/upgrade/update option for including other applications (from the already existing application packages).
Here the project has been given “Vaamana” as code name for the project because of its tiny structure in small size and is only requesting a few space first and has the ability of the distro to grow to an immense size by adding more and more applications further. Also it is an open source project which will be distributed in free in the future, and hoping that it will make an end to the supremacy of costly operating systems in the market (Like Vaamana suppressed the supremacy of Maha-Bali in Hindu Myth).
1.2 Team Profile
Here us ourselves called as GEN-X App Squad, where the word ‘GEN-X’means the “The Generation following the baby boom”, here it quote Linux were in a baby life through the 1990 to 2010. Now we are in a generation following that baby era, with God’s grace Vaamana will be in these generation fighting against the supreme leaders in the current era…
Here the team name “GEN-X APPS” coming from the first letter of our names as
GEN-X – GEETHU P P
A – AKHI M B
P – PRASEETHA P M
P – PREETHA M P
S – Mr. SIJO S VADAKKAN (Our Project Guide)
“Bring Experience… is our mantra, so just keep telling “bring… bring… bring …. The experience” while experiencing Vaamana 😉
ABSTRACT
CODE NAME: ‘ VAAMANA’
Vaamana Linux tiny distro is proposed to be an Unix-like (Almost like Linux) disro or can mention it as a tiny Linux operating system which will be in very small in size , can be able to run in minimum requirement systems and can be portable through a flash drive ,or via a CD or via a Memory Card It will be a complete bootable distro which runs in the computer’s memory, rather than loading from the hard disk drive ( can be also possible to install on Hard Disk). It can run on a computer lacking secondary storage, such as a hard disk drive, or with a corrupted hard disk drive or file system, allowing users to rescue data.
The base install is competent enough for a variety of tasks. That may include, a cluster of useful tools included as a part of the minimal install, including a paint tool (like gimp, a simple raster/bitmap graphics editor), a PDF reader, multimedia players and a text editor. If you feel the need to expand out of the minimal applications, our system will contain an Install/upgrade/update option for including other applications (from the already existing application packages).
It has been given “Vaamana” as code name for the project because of its tiny structure in small size and is only requesting a few space first and has the ability of the distro to grow to an immense size by adding more and more applications further. Also it is an open source project which will be distributed in free in the future, and hoping that it will make an end to the supremacy of costly operating systems in the market (Like Vaamana suppressed the supremacy of Maha-Bali in Hindu Myth).
ACKNOWLEDGEMENT
We take this opportunity to express our gratitude to all, whose contribution in this project work can never to forget. First of all we owe our gratitude to God Almighty for showering abundant blessings on us to complete this project.
We are grateful to Mrs.Jancy Paul, Head of the MCA Department, Govt.Engg.College, Thrissur for her continuous support, effective guidance and invaluable advices and suggestions.
It is our utmost duty to express our extreme gratitude to Mr.Sijo S Vadakkan, our internal guide, for his guidance and encouragement, which led this work to its successful completion. We are also grateful to Prof.Nalini E S, Prof.Ali M A, Mrs.Soumia Chandran M, Mrs.Hridhya, Mr.Sasi Kumar M N and all the teachers of Department of MCA for their excellent moral support.
We are also grateful to my colleagues, friends and family members for their co-operations and moral support. We are deeply indebted to our members for their awesome and never ending support and co- operation.
Once again we thank one and all who have helped us directly and indirectly in the successful completion of the project work.
AKHI M B
GEETHU P P
PRASEETHA P M
PREETHA M P
TABLE OF CONTENTS
1 INTRODUCTION 1
1.1 Project Overview 1
1.2 Team Profile 3
2 SYSTEM ANALYSIS AND DESIGN 4
2.1 SYSTEM ANALYSIS 4
2.1.1 The Existing System 4
2.1.2 Requirements of New System 5
2.1.3 Proposed System 6
2.1.4 Technical/Economical/Operational Feasibility 6
2.1.5 System Requirement Specification 7
2.2 SYSTEM DESIGN AND DEVELOPMENT 8
2.2.1 Source Code Modification Module 8
2.2.2 Graphical User Interface Module 9
2.2.3 Merging and Execution Module 10
2.2.4 Installation/Updating Module 23
2.2.5 Data Flow Diagrams 32
2.2.6 Unified Modeling Language 37
2.3 SYSTEM IMPLEMENTATION AND TESTING 41
2.3.1 Hardware Used for Implementation 41
2.3.2 System Testing 41
3 TEST RESULTS AND CONCLUSIONS 43
3.1 Tests 43
3.2 Results 45
3.3 Conclusion 46
3.4 Scope for Future Enhancement 47
ANNEXURE 48
I Sample Screen Shots 48
REFERENCES 53
LIST OF TABLES
Sl No Page No
1 Characteristics of Different Operating Systems 4
2 System Specification Table 7
3 Comparison of Different Window Managers 9
4 Monolithic Kernel V/s Microkernel 11
LIST OF FIGURES
Sl No Page No
1 The Installation Architecture
1.1 Open the installer 28
1.2 Browse to the install files 28
1.3 Boot Codes 29
1.4 Vaamana Installation Options 29
1.5 Vaamana Installation Options – Extensions 30
1.6 Vaamana Install 30
1.7 Vaamana Testing 31
2 Data Flow Diagram
2.1 LEVEL 0 – Context Diagram 32
2.2 LEVEL 1 33
2.3 LEVEL 2.1 – Log in Process 33
2.4 LEVEL 2.2 – Text Editor 34
2.5 LEVEL 2.3 – PDF Reader 35
2.6 LEVEL 2.4 – Paint Tool 35
2.7 LEVEL 2.5 – Sound/Video Player 36
2.8 LEVEL 2.6 – Package Manager 36
3 Unified Modelling Language – Design
3.1 Use Case Diagram 37
3.2 Model Activity
(a) Log in Process 38
(b) Text Editor 38
(c) PDF Reader 39
(d) Paint Tool 39
(e) Sound/Video Player 40
(f) Package Manager 40
4 Sample Screen Shots
4.1 Vaamana Desktop Views 48
4.2 Terminal Window 49
4.3 Settings Panel 49
4.4 Leaf pad – Text Editor 50
4.5 Xpdf – PDF Reader 50
4.6 Mt paint – Paint Tool 51
4.7 Package Manager 51
4.8 Opera 9 – Browser 52
4.9 Shut off/ Exit Window 52
LIST OF ABBREVIATIONS AND ACRONYMS
Government Engineering College, Thrissur
Department of Computer Science and Technology
2012
CERTIFICATE
Certified that this is a bonafide record of the Mini Project titled
VAAMANA – A TINY LINUX DISTRO
Done by
Akhi M B, Geethu P P, Praseetha P M, Preetha M P
of Fourth Semester, MCA
In partial fulfilment of the requirement for the award of the Degree of Master of
Computer Applications of the University of Calicut
During the year 2012
Guide Head of the Dept Examiner
Mrs.Soumia Chandran M Prof. Jancy Paul
Date 27/11/2012
VAAMANA- A TINY LINUX DISTRO
MASTER OF COMPUTER APPLICATIONS
MINI-PROJECT REPORT
2012
Submitted in the partial fulfilment of the requirements for the award
of the Degree of Master of Computer Applications
of the University of Calicut
Done by
AKHI.M.B (ETAKMCA002)
GEETHU.P.P (ETAKMCA008)
PREETHA.M.P (ETAKMCA022)
PRASEETHA.P.M (ETAKMCA020)
Department Of Computer Science and Engineering
Government Engineering College,
Thrissur-680009
GEN-X APP SQUAD PRESENTS
” VAAMANA ”
bring experience..
A tiny Linux distro – as an academic mini project
FIRST EVALUATION REPORT
submitting on 03-09-2012
GEN-X APP SQUAD
INTRODUCTION
In recent years a powerful and innovative Unix work-alike has emerged its popularity is beginning to rival that of its Unix predecessors.
The Linux operating system includes features from both Berkley Software Distribution(BSD) and Unix System V but departs from Unix in several significant ways. The core of the operating system, like kernel is implemented completely independently of both BSD and System V.
The continuing development of Linux is taking place through the combined efforts of many capable individuals throughout the world and Linux puts the power of Unix within easy reach of business and personal computer users.
There is a rich selection of applications available for Linux-both free and commercial . There is also a wide variety of tools: graphical, word processing, networking, web server, web page creation and many others.
“Vaamana” is proposed to be an Unix-like (Almost like Linux) distro or we can mention it as a tiny Linux operating system which will be in very small in size , can be able to run in minimum requirement systems and can be portable through a flash drive ,or via a CD or via a Memory Card.
It will be a complete bootable distro which runs in the computer’s memory, rather than loading from the hard disk drive ( can be also possible to install on Hard Disk). It can run on a computer lacking secondary storage ,such as a hard disk drive, or with a corrupted hard disk drive or file system, allowing users to rescue data.
The base install is competent enough for a variety of tasks. That may include, a cluster of useful tools included as a part of the minimal installation, including a paint tool (a simple raster/bitmap graphics editor ) , a PDF reader, multimedia players and a couple of text editors.
For lightweight and embedded projects, it rather unbelievably includes a fully functional web server with PGP/CGI support. If you feel the need to expand out of the minimal applications, our system will contain an install/upgrade/update option for including other applications (from the already existing application packages).
We are giving “Vaamana” as code name for the project because of its tiny structure in small size and is only requiring a few space first and has the ability of the distro to grew to an immense size by adding more and more applications further. Also it is an open source project which will be distributed in free in the future, and hoping that it will make an end to the supremacy of costly operating systems in the market ( Like Vaamana suppressed the supremacy of Maha-Bali in Hindu Myth ).
Our proposed system will contain mainly five modules
a) Source Code Creation /Modification Module.
b) Graphical User Interface Module.
c) Creation of a text editor.
d) Merging and Compilation Module.
e) Updating/Installation of Software’s and Packages.
EXISTING SYSTEM
The existing systems are also, current operating systems available in the present market that have advantages as well as disadvantages. And by studying about these systems , we understood that there ate no ideal operating system having features like portability, scalability, small in size ,easily bootable, ease of installation, deployment and use.
PROPOSED SYSTEM
The proposed system has been designed to eliminate the major disadvantages of the existing systems. The additional features and facilities provided in the proposed system such as portability, scalability, small in size ,easily bootable, ease of installation, deployment, use and metro GUI makes the new system into more flexible and efficient.
Proposed system is feasible under the current scenario in the case of economical and technical feasibility but considering operational and time feasibility ,it’s so much difficult to built an ideal system within a couple of months.
SYSTEM REQUIREMENTS
DATA FLOW DIAGRAM Read the rest of this entry »
Vaamanalinux is proposed to be an Unix-like (Almost like Linux) disro or we can mention it as a tiny Linux operating system which will be in very small in size , can be able to run in minimum requirement systems and can be portable through a flash drive ,or via a CD or via a Memory Card It will be a complete boot-able distro which runs in the computer’s memory, rather than loading from the hard disk drive ( can be also possible to install on Hard Disk). It can run on a computer lacking secondary storage ,such as a hard disk drive, or with a corrupted hard disk drive or file system, allowing users to rescue data.
The base install is competent enough for a variety of tasks. That may include, a cluster of useful tools included as a part of the minimal install, including a paint tool (like gimp, a simple raster/bitmap graphics editor ) , a PDF reader, multimedia players and a couple of text editors. For lightweight and embedded projects, it rather unbelievably includes a fully functional web server with PGP/CGI support. If you feel the need to expand out of the minimal applications, our system will contain an install/upgrade/update option for including other applications (from the already existing application packages).
We are giving “Vaamanaa” as code name for the project because of its tiny structure in small size and is only requesting a few space first and has the ability of the distro to grew to an immense size by adding more and more applications further. Also it is an open source project which will be distributed in free in the future, and hoping that it will make an end to the supremacy of costly operating systems in the market (( Like Vaamana suppressed the supremacy of Maha-Bali in Hindu Myth ).
System Requirements :
Minimum 192 MB RAM
Minimum 300 MB hard disk space
Kernal type is Monolithic(Linux Kernal)
UNIX like Operating system family
Runs from CD, Flash-drive or embedded as a guest OS
Kernal is structured in C programming language.
